Learn how to design, cut, weed, and press iron-on vinyl (HTV) onto a cotton shirt using Cricut Design Space, plus my best beginner tips for clean, long-lasti...
Maker Vinyl
Updated October 17, 2026
HTV on Baseball Caps Without a Hat Press
Learn how to apply heat transfer vinyl to baseball caps using a mini heat press or household iron, plus curved-surface hacks to prevent wrinkles, lifting, and scorch marks.

Harper Davis
Harper Davis is a lifelong DIY enthusiast and cutting-machine expert who loves helping beginners conquer Cricut Design Space. With over six years of experience running a custom vinyl shop, she shares practical tutorials, material guides, and creative inspiration.
Hats can feel like the final boss of HTV because everything you love about a comfy baseball cap is exactly what makes vinyl tricky: curves, seams, and squishy structure. The good news is you do not need a hat press to get a clean, pro-looking result. With the right setup (and a couple of crafty little “hold the curve” hacks), you can press HTV on caps using a mini heat press or even a regular household iron.
I am going to walk you through two methods, plus my favorite fixes for the classic hat problems: wrinkled vinyl, edges lifting, and that annoying little brim line showing through your design.
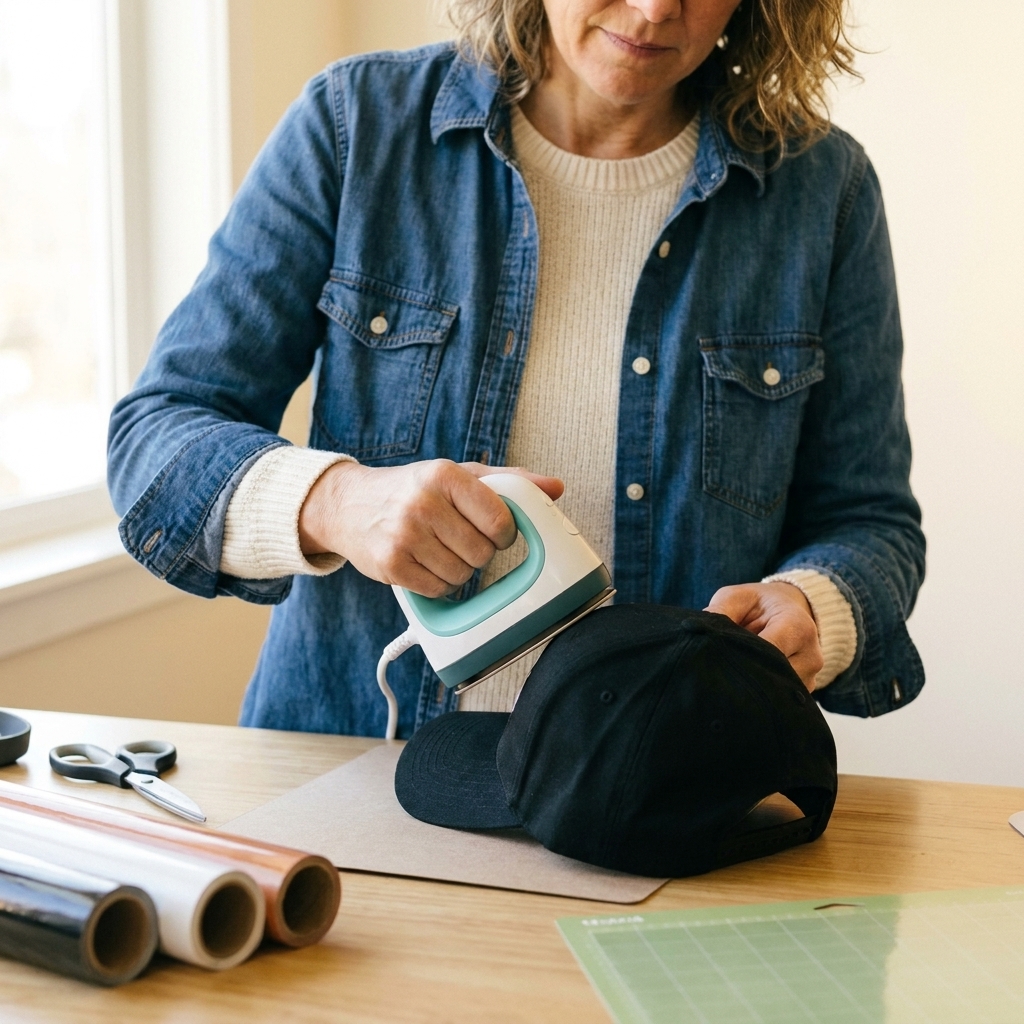
Before you start: hat and HTV basics that matter
Caps are not all built the same, and your material choices affect how forgiving the project will be.
Pick the right cap style
- Structured caps (stiffer front panels) are easier for beginners because the front does not collapse while you press.
- Unstructured caps (soft front) can absolutely work, but they need more support underneath to keep the panel smooth.
- Mesh-back trucker hats can be pressed on the front panel, but keep heat away from the mesh because it can warp or melt.
Choose HTV that plays nice on curves
- Standard HTV works great for most hats if your design is not huge.
- Stretch HTV is my favorite for softer caps because it flexes with the fabric and resists cracking.
- Glitter and thick specialty HTV can work, but it is less forgiving on curves and usually needs more pressure.
- Puff HTV looks amazing on hats, but it is picky. Follow the brand’s temp, time, and pressure exactly, and avoid over-pressing or it can flatten.
Keep designs “hat-sized”
A simple rule: smaller designs behave better. On many adult baseball caps, a design around 2.25 to 3 inches tall and 3.5 to 4.5 inches wide tends to look balanced and press smoothly.
Quick caveat: youth hats, low-profile caps, and tall-crown truckers can change what “normal” looks like. If the front panel is short, go shorter. If it is tall, you have more room, but still try to keep your design off seams and deep curves.
Material note: A lot of caps are cotton blends or polyester. Polyester (and some dyed cottons) can scorch or get shiny faster, so start conservative and test your settings on the inside of the hat, on a hidden area, or on a cheap practice cap if you can.
Supplies (hat press not required)
- Baseball cap (clean and dry)
- HTV (heat transfer vinyl)
- Cricut (or other cutting machine) and standard cutting mat
- Weeding tools
- Heat-resistant tape (strongly recommended for hats)
- Mini heat press or household iron
- Teflon sheet or parchment paper (pressing barrier)
- Lint roller
- Small scissors (for trimming carrier sheet close to the design)
- Hat shaping support (pick one): a hat pressing pillow, a folded towel, a small firm pillow, or a rolled-up hand towel
If you have one, a heat gun or even a hair dryer can help with quick touch-ups, but it is optional.
One more heads up: Avoid pressing directly over embroidery, metal eyelets, buckles, or buttons. They can block pressure, dent your design, or overheat.
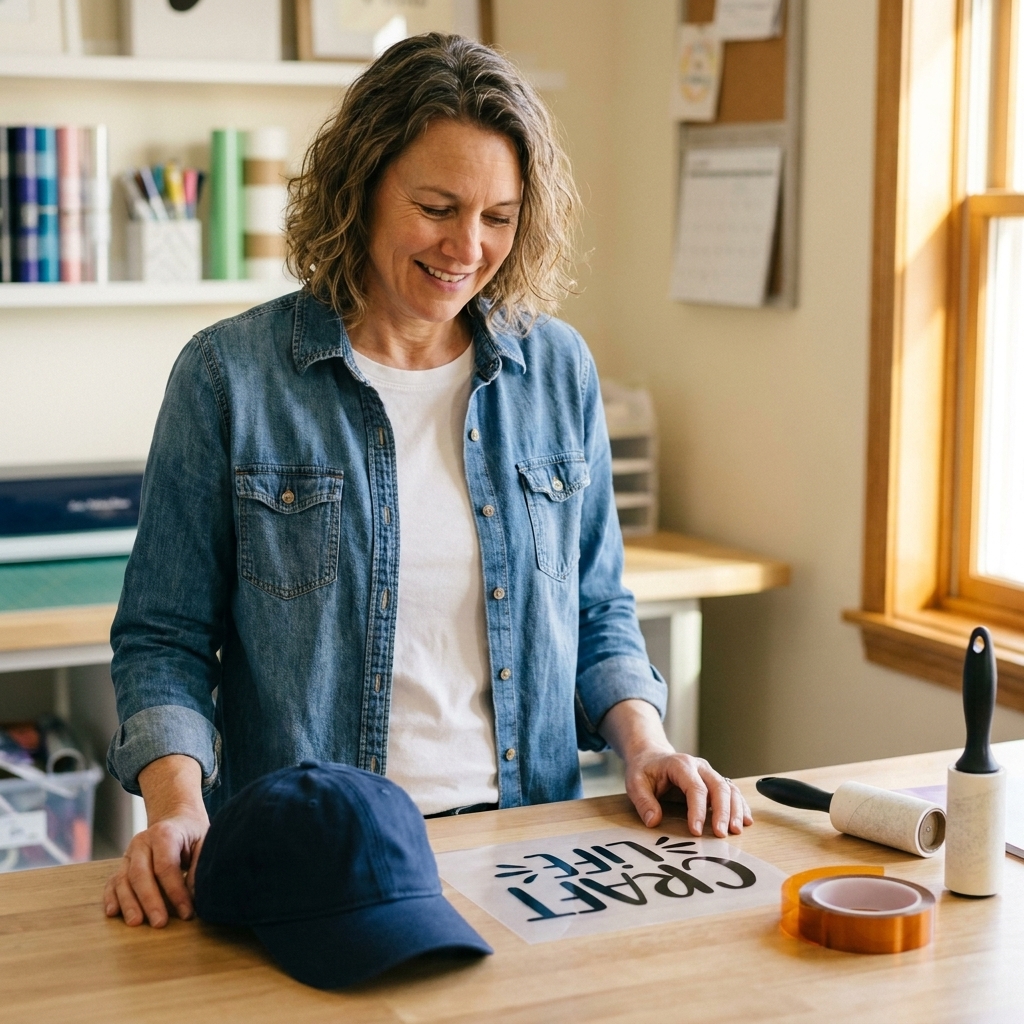
Prep: the curved-surface hacks that prevent wrinkles
Most hat fails happen before heat ever touches vinyl. This prep takes five minutes and saves you from wasting a cap.
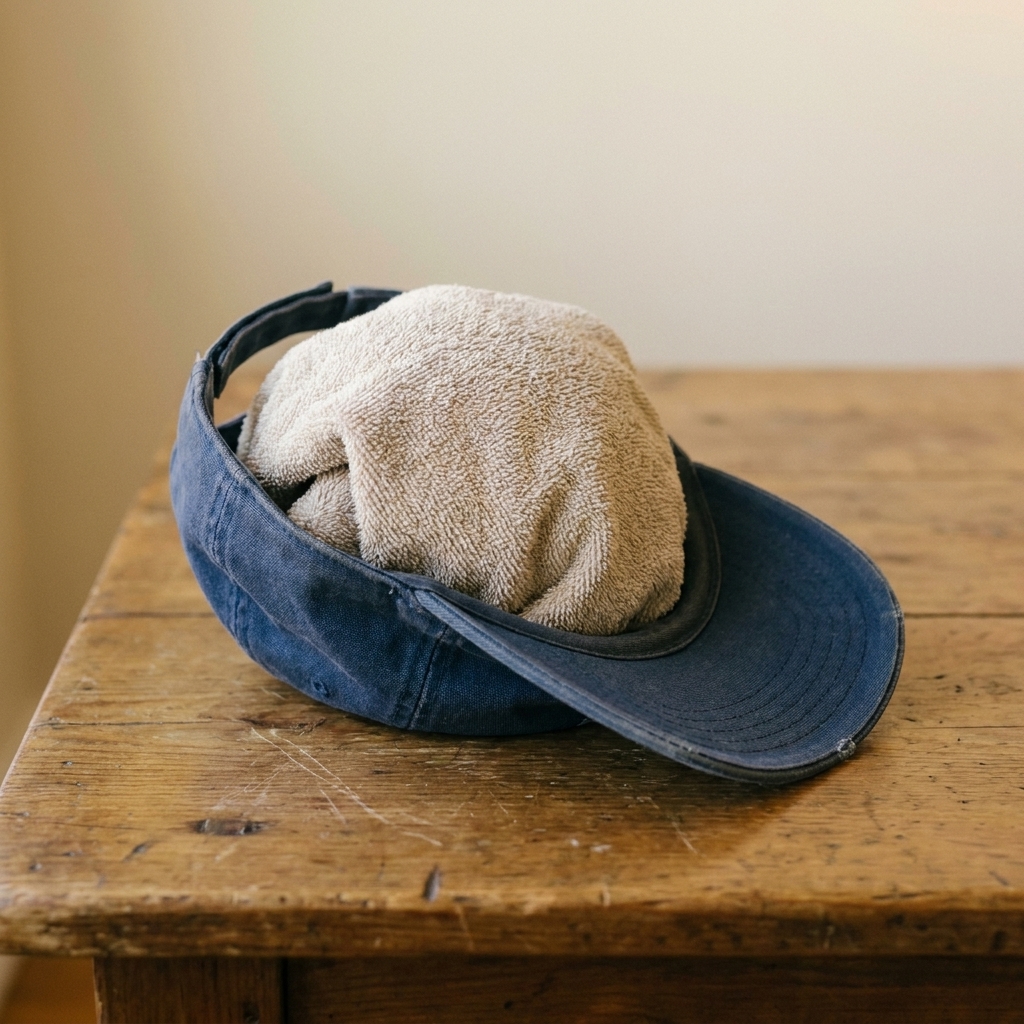
1) Build a firm “hat form”
You need the front panel taut and smooth, like a tiny drum. Try one of these:
- Hat pressing pillow: best option if you already own one.
- Folded towel: fold until it is firm, not squishy.
- Rolled hand towel: great for unstructured hats because you can adjust the thickness.
- Small firm pillow: works in a pinch, just keep it steady.
Slide your support inside the cap so the front panel is stretched smooth. You want the seam to sit naturally, not pulled sideways.
2) Find center before you tape
Hats are sneaky because the curve messes with your eyeballs. If your cap has a center seam, use it as your centerline. If it does not, do a gentle fold to find center (do not crease it hard), then mark the center with a tiny piece of tape.
Aiming for a classic front placement? The bottom of most designs looks best about 0.5 to 1 inch above the brim seam, as long as you are not overlapping that thick ridge.
3) Lint roll like you mean it
Caps love lint, especially darker colors. Lint and fuzz trapped under HTV can create visible bumps and texture, even when everything else is pressed perfectly.
4) Preheat the hat panel
Do a quick pre-press to remove moisture and flatten the fibers:
- Mini heat press: 5 to 8 seconds, light to medium pressure.
- Iron: 5 to 10 seconds, no steam.
Let it cool for a few seconds before you place vinyl so the carrier sheet does not slide around on warm fabric.
Step-by-step: HTV with a mini heat press
This is my go-to method because a mini press can “hug” the curve and you can focus pressure exactly where you need it.
1) Cut and weed your design
- Mirror your design in Cricut Design Space.
- Cut with the shiny carrier sheet side down on your mat.
- Weed, then trim the carrier sheet close to your design. Less excess carrier means fewer chances for creases.
2) Place and tape the design
Center your design on the cap front (use the center seam if you have one). For many caps, I like the bottom of the design to sit about 0.5 to 1 inch above the brim seam (the seam where the front panel meets the brim), but keep the actual vinyl off that ridge whenever possible.
Use heat-resistant tape on two to four edges of the carrier sheet so it cannot drift while you press. Hats are slippery, and one tiny shift looks huge when it is off-center.
3) Cover with parchment or Teflon
This protects the cap fabric and reduces shine marks.
4) Press in small sections
Instead of trying to press the whole design in one go, work in overlapping “zones”:
- Start in the center of the design.
- Press for 10 to 15 seconds with firm pressure.
- Move slightly left, press again.
- Move slightly right, press again.
- Finish top and bottom edges with short presses (about 5 to 8 seconds each) where lifting usually tries to start.
Temperature tip: HTV settings are brand- and material-dependent. Always follow the temperature, time, and peel instructions for your specific vinyl (Cricut, Siser, StarCraft, and others can differ). If you are unsure where to start, many standard HTVs often press somewhere in the 305 to 320°F range (about 150 to 160°C), but treat that as a common starting point, not a promise. If your mini press does not show exact temps, start at a medium setting and adjust only if you see lifting or incomplete adhesion.
5) Let it cool, then peel the carrier
Some HTV is warm peel, some is cool peel. Follow your vinyl’s instructions. If you are not sure, let it cool for 30 to 60 seconds and try peeling a corner.
If an edge lifts, lay the carrier back down and press that spot again for 5 to 8 seconds with firm pressure.
6) Final “seal” press
Once the carrier is off, cover with parchment and do a final press for 5 to 10 seconds to lock in the edges.
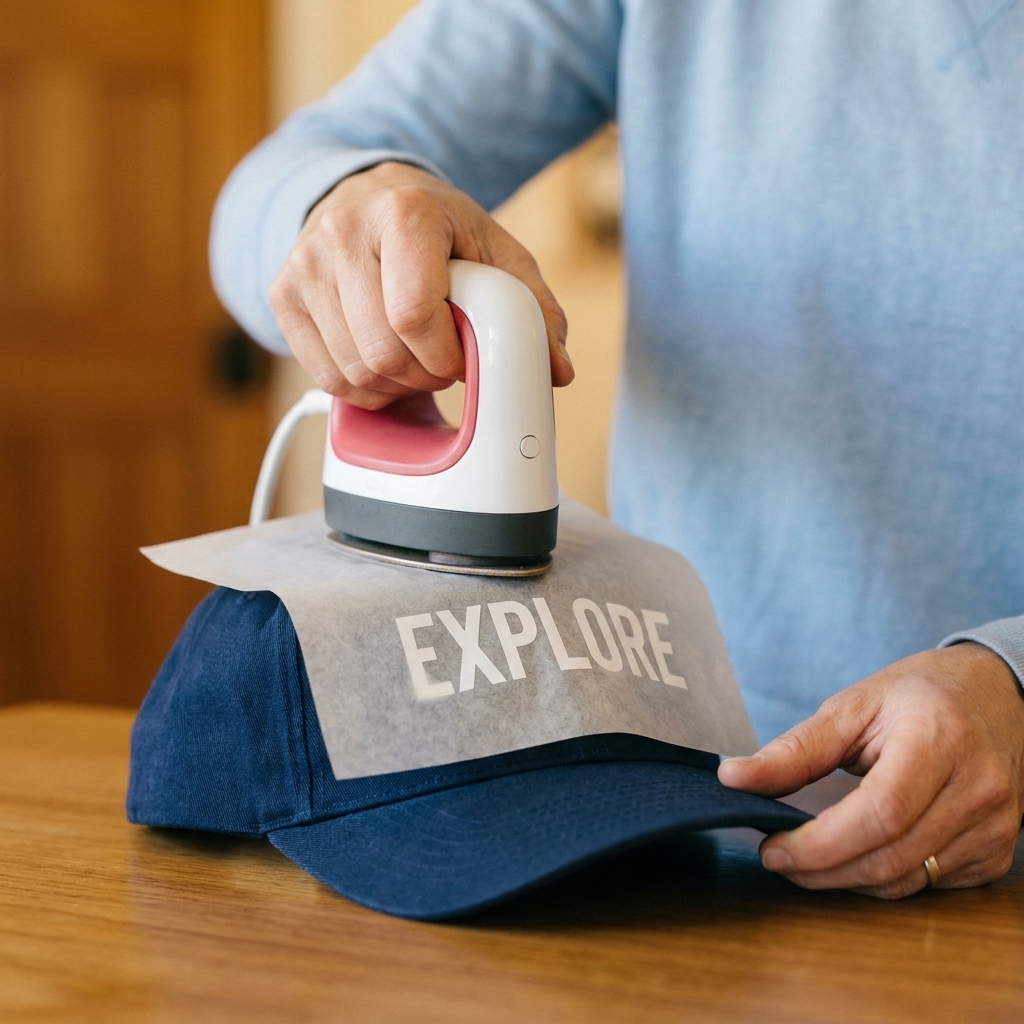
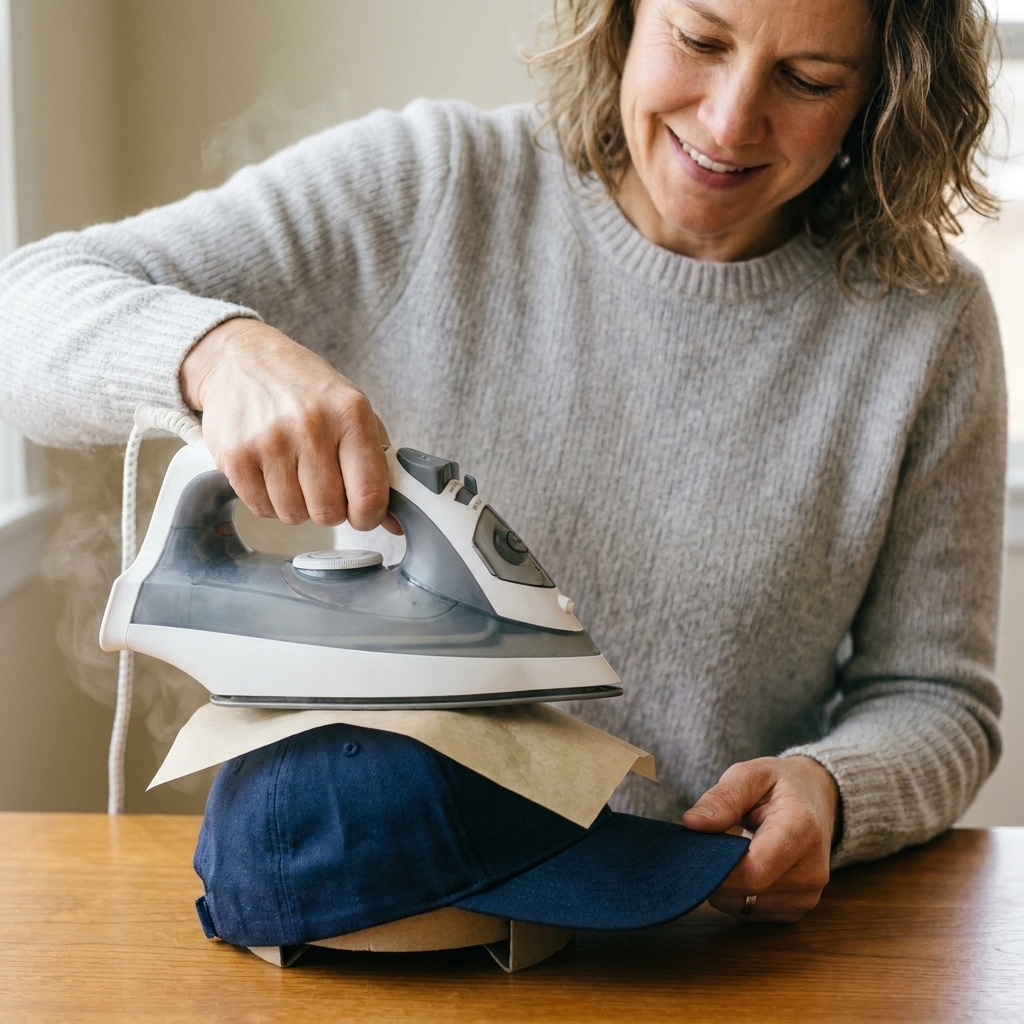
Step-by-step: HTV with a household iron
You can get great results with an iron, but you have to treat it like a press, not like you are ironing a shirt.
1) Set your iron correctly
- No steam. Empty the water reservoir if your iron likes to leak.
- Use a firm, flat surface underneath the hat (your towel form inside the hat still counts, but set the hat on a sturdy table).
- Choose a setting that approximates your HTV requirement. For many standard HTVs, that is often in the Cotton range, but always defer to your vinyl’s instructions. If your iron runs hot, start one notch lower.
2) Preheat the hat
Press the front panel for 5 to 10 seconds to remove moisture.
3) Tape the design in place
This matters even more with an iron because you will be pressing in sections and the carrier can creep.
4) Press, do not slide
Place parchment over the design, then press straight down with firm pressure. Hold for 15 to 20 seconds per section (or whatever your vinyl brand recommends).
Lift the iron completely, move to the next overlapping section, and press again. Sliding is what causes wrinkles and shifted designs on curved hats.
5) Peel and finish press
Follow the HTV peel instructions for your brand. After the carrier is removed, cover with parchment and do a final 5 to 10 second press across the design, section by section.
Tricky spots: seams, brims, and curved panels
Avoid the brim seam ridge
That thick seam at the base of the front panel can create a gap where HTV edges refuse to stick. Try these fixes:
- Move the design up so no part of it overlaps the seam ridge.
- Use a smaller design or split text into two lines to keep it on the smoothest area.
- Press edges last with targeted pressure right where lifting wants to happen.
Dealing with center seams
Many caps have a seam running right down the middle. If your design crosses it, pick vinyl that is more forgiving (stretch HTV is great) and press in sections, focusing extra time on the seam area. If you are using thick glitter HTV, consider a design that sits to one side or is narrow enough to avoid the seam.
Mesh and synthetics
If your cap is polyester, nylon, or has mesh nearby, keep temps conservative and always use a pressing barrier. If the cap fabric looks like it is getting shiny or wavy, reduce heat and increase pressing time slightly instead.
My best “no waste” tips
- Trim the carrier close to the design so it can flex with the hat curve without creasing.
- Tape is your best friend. Two small pieces can prevent a crooked design.
- Press in zones. Curves love small presses, not one big press.
- Use firm support inside the cap. If the cap collapses, the vinyl wrinkles.
- Do not rush the peel. If it resists, it needs more heat or more pressure, not more confidence.
- Test first when you can. A quick press test on the inside panel (or a budget practice cap) can save a favorite hat from scorch marks.
- Let it cool flat for a minute before you wear it, especially with puff or stretchy HTV.
Troubleshooting
My HTV is wrinkled after pressing
- Your hat was not supported firmly enough. Reinsert a thicker towel form and re-press with parchment for 5 to 8 seconds.
- You slid the iron or press. Next time, lift and press, do not glide.
- The carrier sheet creased. Trim closer to the design so the carrier can curve without folding.
Edges are lifting near the bottom seam
- Press that edge with extra targeted pressure (mini press works great here) for 5 to 10 seconds.
- Make sure the seam ridge is not under the edge of your design. If it is, reposition higher on the next cap.
The vinyl did not stick at all
- Double-check that you used HTV (heat transfer vinyl), not permanent adhesive vinyl.
- Your temperature may be too low, or you are not applying enough pressure. Increase pressure first, then heat in small increments, and always defer to your brand’s settings.
- Steam or moisture can ruin adhesion. No steam and always preheat the cap.
Shiny press marks on the hat
- Always use parchment or a Teflon sheet.
- Lower heat slightly and press a bit longer instead of blasting high heat.
- If you are working on polyester, test first and keep your press moving zone to zone rather than overheating one spot.
My design looks crooked on the hat
Use the center seam as a guide (when available), and measure from the side seams to the edges of your carrier sheet before pressing. If there is no center seam, do a gentle fold to find center, then line up your design to that center point. Heat-resistant tape helps you keep it locked in once it is straight.
Care instructions
- Wait 24 hours before heavy wear or cleaning if possible.
- Spot clean gently. If you must wash, hand wash cool and avoid soaking the vinyl area.
- Do not iron directly on the vinyl later. If it needs a touch-up, use parchment and brief heat.
- Avoid high-heat dryers. Repeated high heat can reduce adhesion longevity over time, especially on curved surfaces.
FAQ
Can I use permanent adhesive vinyl on a hat instead of HTV?
I do not recommend it for fabric. Permanent vinyl is meant for hard surfaces and it tends to peel and crack with wear. HTV is designed to bond with fabric fibers and flex.
Do I need a special hat blank for HTV?
No. Most cotton or cotton-blend caps work well. Just be cautious with delicate synthetics or very heat-sensitive fabrics, and always use a pressing barrier.
What is the easiest HTV for hats?
Standard everyday HTV is great, but stretch HTV is the most forgiving on curved and slightly squishy cap panels.
Can I layer HTV on a hat?
Yes, but keep layers minimal and designs compact. Use short tack presses for the first layer, then finish with a full press on the top layer. Thick layered designs can feel stiff on a cap.